Monday, February 20, 2012

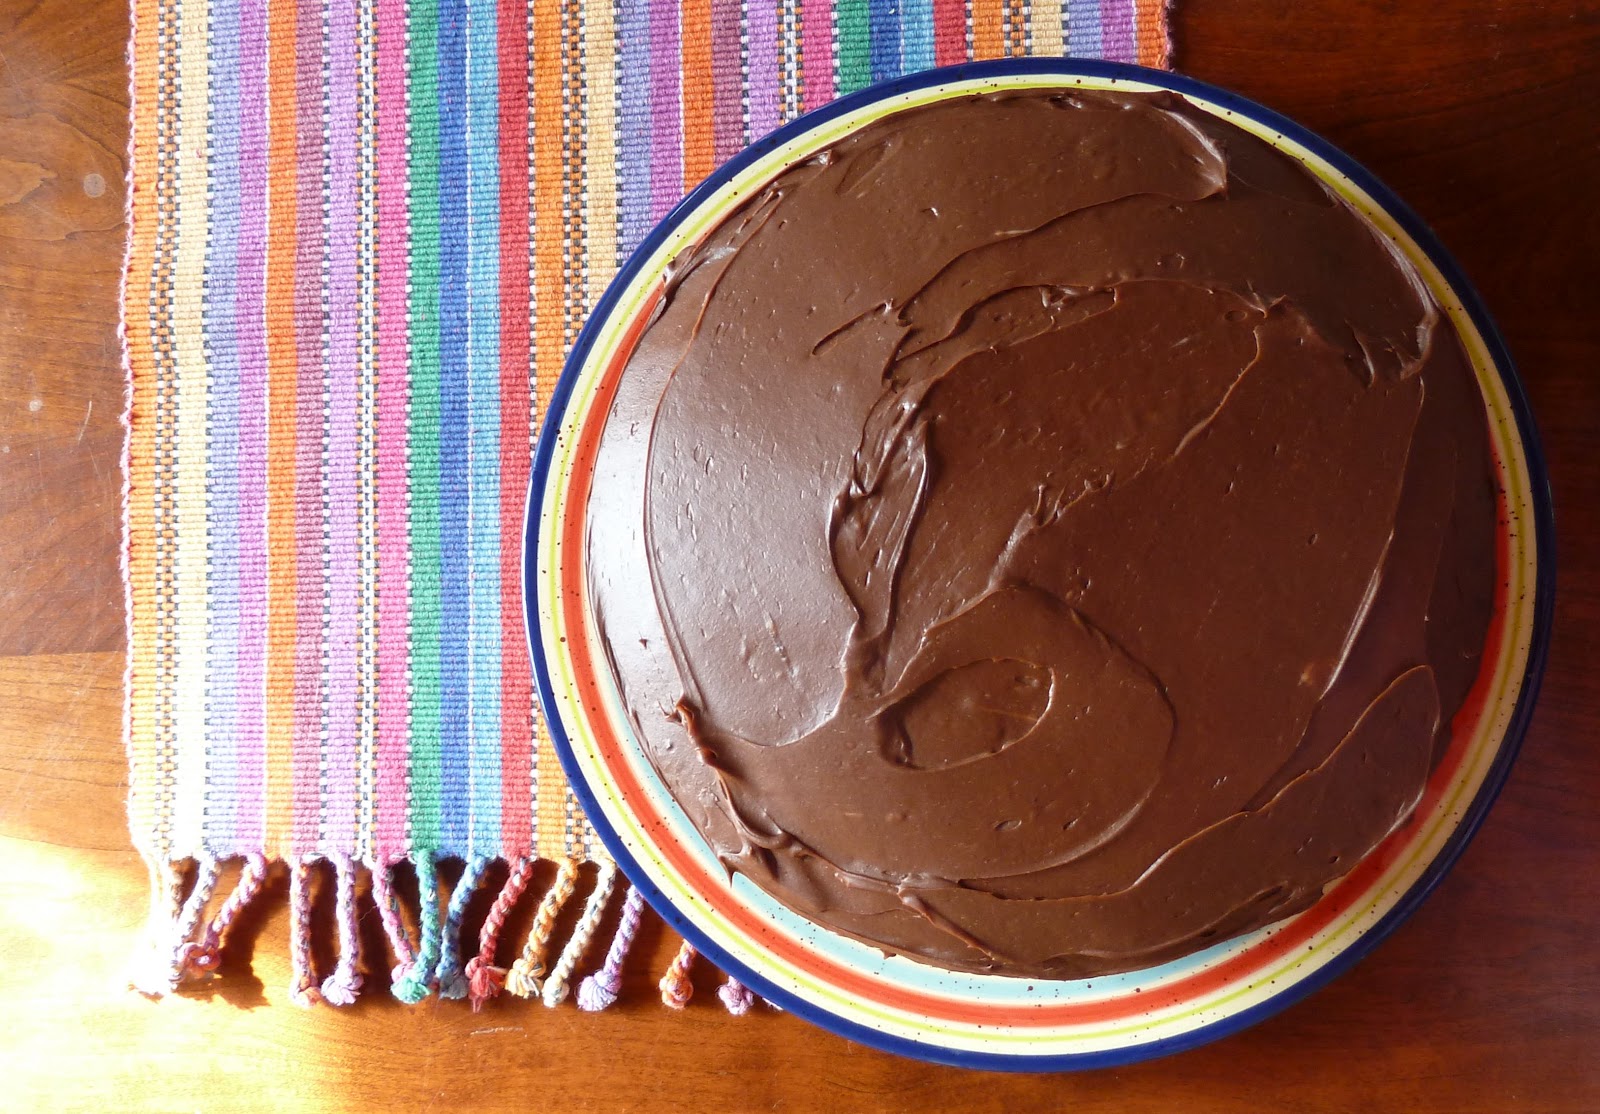
The "Best" Chocolate Cake...two ways


    I know it has been some time since I last posted and I do have a few recipes to share. I have made this particular chocolate cake recipe four times in the last month and just today I did a variation on the frosting, prompting me to finally write the post. This is a chocolate cake recipe that I found in "Quick Vegetarian Pleasures", a cookbook a friend of mine told me about many years ago. In fact, she made this cake for my daughter's 5th birthday while we were visiting them in Seattle in 1996.    
    It is an easy cake to whip up and is nearly foolproof, REALLY! The taste and texture is quite similar to my mom's "Never Fail Chocolate Cake" recipe which was the standard birthday cake in my house growing up. 
    A few months ago I splurged at TJ MAXX and bought two new cake pans. They are 9 inch pans and were of a heavier weight than the pans I had used for years. WHAT A DIFFERENCE they make. My cakes rise much higher now.  For this cake I have adjusted the quantities to 1.5 times the original. This makes the layers nice and thick and it looks great when you cut into it.

"Best" Chocolate Cake

Ingredients:
3 1/3 cups flour
2 1/4 cups white sugar
3/4 cocoa(I use King Arthur Double Dutch Dark Cocoa)
2 1/4 tsp. baking soda
1+ tsp. salt
3/4 cup vegetable oil
2 1/4 tsp. white vinegar
2 tsp. vanilla extract
2 1/4 cups warm water

Preheat oven to 350 degrees. Butter and flour your cake pans and set aside.

In a large bowl, mix together the first 5 ingredients. Then make a well in the middle and add the oil, vinegar, vanilla and water and stir until well blended. You do NOT need to use an electric mixer.

Divide your batter evenly between the two pans and bake at 350 degrees for ~30 minutes or until a toothpick inserted in the middle comes out clean. Let cakes cool about ten minutes before removing from pans and let cakes cool completely before frosting.

Option #1: Easy Chocolate Icing
2 cups semisweet chocolate chips
12 TBS. butter, softened
1 egg

Melt chocolate chips in top of double boiler. In mixing bowl, cream butter until soft and smooth, then beat in egg. Pour in melted chocolate and then mix until smooth. Frost your cake right away and then chill the cake for at least one hour to help the frosting "set". Let the cake sit at room temperature for ~30 minutes before serving.

Option #2: Easy Caramel Icing
1 stick of butter
2 cups of brown sugar(firmly packed)
1/2 cup milk (I used 1/4 cup heavy cream and 1/4 cup skim milk)
~3-4 cups of confectioner's sugar
1/2 tsp. vanilla extract
more milk or cream, as needed
~ 1/2 tsp. sea salt or espresso salt

In a medium saucepan, mix together the butter, brown sugar and milk/cream. Bring to a boil on medium heat and let boil for 3 minutes. Remove from heat and cool.

Then mix in the confectioner's sugar and vanilla. You may want to add more milk or cream to achieve your desired consistency.

   Frost your cake while the frosting is still slightly warm so that it is easier to spread. Sprinkle the top of your cake with sea salt or espresso salt(as I did). Because the caramel icing is quite sweet, the salt adds a nice contrast and it helps to balance the flavors. As the caramel sets, the frosting becomes firm, but not hard, so do not worry if it becomes difficult to frost. You can add more milk or simply put your knife in some hot water and then use it to smooth out the icing on the cake.
   So cut yourself a slice of cake, pour a glass of cold milk and sit down and enjoy.

yours in baking-
p

Sunday, January 29, 2012

Amaretti Amore

   Midwinter is always a good time to mix things up and I decided to have an Italian Night....loving to bake as I do I wanted to bake some ridiculously elaborate cake, but decided to try making panna cotta instead(which I did and it was rather tasty). Of course, I still had to bake SOMETHING, so I decided to try my hand at making those delicious little almond cookies I always see in the orange and red tin..Amaretti. I found this recipe online and it seemed deceptively easy, much too easy to taste like the real thing, but they do! I made mine a little larger than the tiny little ones that I have seen before and I think the larger size lends itself to more of the moist chewy inside which I really like.
Amaretti Cookies
4 cups of slivered almonds
2 cups of granulated sugar
4 large egg whites
1 tsp. almond extract
confectioner's sugar

In a food processor, blend the almonds with the sugar until the mixture is very fine. Place in a large bowl.

Whip the egg whites with an electric mixer until stiff peaks form. Add the almond extract, and then fold gently into the almond/sugar mixture. Your "dough" should now look like almond paste...thick with a little sheen.

Prepare three cookie sheets with parchment paper and then place heaping tablespoons of the cookie dough onto the sheet. The cookies spread very little while baking so they can be relatively close together. Dust with confectioner's sugar and let the cookies set until dry(about two hours).

Preheat the oven to 300 degrees and bake on the middle rack for 20-30 minutes or until the edges are just startign to turn G, B and D(golden, brown and delicious). Remove to a wire rack and then let cool. I baked only one sheet the first round to make sure they baked evenly, but I was able to bake the remaining two sheets the second round and just rotated the sheets twice during the cooking time. It worked just fine. I made about 40 cookies of the slightly larger than normal size.

These cookies keep well especially in the winter when my house is dry because of the wood stove. They are delicious served alongside a panna cotta or simply on their own with a cup of steaming espresso. 

enjoy-
yours in baking-
p


Sunday, January 22, 2012

Grandma Meets Orville

 
POPCORN BALLS!
   If you are looking for an easy and simple treat, these are for you. An old family friend, Ola McAllister used to make these for me and my brothers when we were growing up and would go to visit her in Fryeburg, Maine. She was one of the best cooks I have ever met and she did all of her cooking on a wood stove with a wood fired oven. Her pies and rolls were to die for. Anyway, these are "Olie's" Popcorn Balls and use a traditional Maine sweetener, at least in my family....molasses.
Olie's Popcorn balls 
1 cup molasses (I use Grandma's, obviouly)
1/2 cup sugar
2 TBS. butter
1/2 tsp. salt 
1 (scant) TBS cider vinegar 
3/4- 1 cup unpopped popcorn (hence, the Orville) 
more butter for forming the balls 

First pop the popcorn. I used only 1/2 cup of popping corn(in an air popper) for this batch and I think that they are too sweet so I would increase the ratio of the popped corn to the molasses mixture. I think 3/4 cup should be fine, but you may even want to use the full cup. Remove any unpopped kernels and put popcorn in large bowl.
   On low heat, heat all other ingredients together, stirring frequently. Place a candy thermometer in the pan and keep a close eye on it until the temperature reaches 121 degrees Celcius (hard ball stage). Remove from heat and stir into popcorn mixture until popcorn is coated evenly. Let cool for a few minutes, then rub your hands together and form into balls. Let sit for a bit before enjoying. They should be crispy, sweet and delicious.

enjoy-
yours in baking-
patty


Sunday, November 13, 2011

Happy Birthday(cake)!!


  It was my sister-in-law's birthday so I offered to bake a cake. I wanted to try a new recipe and I found a good one for a yellow cake. I always wish for my made-from-scratch cake to have the same tender crumb of a cake mix but without the weird flavors that come with using a mix. I have to say that this one is pretty darn close. It is certainly more dense than a mix, but it has a nice crumb and good flavor. I thought of spreading some homemade raspberry jam in the middle and frosting it with a vanilla buttercream, but them decided a chocolate buttercream was a better choice for a fall cake. So here it is. I actually think my favorite part of the entire cake is the edible "Disco Dust" I found at a specialty shop. The photos really do not do it justice...it is really fun! I recommend you get some and try it for yourself.
 
Yellow Cake
4 cups plus 2 TBS. sifted cake flour 
2 tsp. baking powder 
1 1/2 tsp baking soda
1 tsp salt
2 sticks softened butter
2 cups sugar
2 tsp. pure vanilla extract
4 large eggs, room temperature
2 cups buttermilk (or two cups milk with 1 tsp. vinegar)

Preheat oven to 350 degrees. Butter and flour two nine-inch cake pans and set aside. Sift flour together with baking powder, baking soda and salt. In a large mixing bowl, cream together butter and sugar until light and fluffy. Mix in vanilla, turn down the mixer to slow speed and then add eggs one at a time, being sure to mix well after each. Mix in buttermilk just until blended. Don't worry, the mixture at this point will look a little curdled. Then slowly add the flour mixture in three parts. Divide evenly between the two pans. Lightly tap each pan on the counter a few times to eliminate any air bubbles. Bake for ~30 minutes until cake is done when a tester is inserted. Take out of oven and place pans on a wire rack for ten minutes before removing from pans.

Chocolate Buttercream Frosting
makes about 4 cups

1 1/2 sticks softened butter
4 1/2 cups confectioner's sugar
1 1/2 tsp. vanilla
1/8 tsp. salt
5 TBS. milk or cream
6 ounces unsweetened chocolate(chopped)

Melt chocolate in top of double boiler and stir until smooth. Take off heat and set aside to cool. In mixing bowl, mix the other 5 ingredients together until smooth. Then pour in chocolate and mix until on high speed until thoroughly combined. You may want to add another tablespoon or two of milk if it seems too stiff. This frosting will spread nicely and then "set up" a bit while the cake stands, so do not be afraid to have the frosting kind of soft to start out.

I flipped each layer of my cake upside down to frost. The top is so moist, the crumbs are easily pulled off by the frosting. This method seems to work well and the cake is nice and level when you are finished. Find some "Disco Dust" and sprinkle liberally on top for a fun finish.

This cake is best served with a cup of coffee or a tall glass of milk.
Enjoy- 
yours in baking-
p


Sunday, November 6, 2011

Madeleines and Tea

    This past summer, I splurged and bought a madeleine pan. It was a bit of an investment ($35 for a very nice one), but I had always wanted to make them and the pan moved me one step closer. A few weeks ago I had a Julia Child themed dinner party and I quickly baked some madeleines in the afternoon to serve as one of the desserts. I was amazed at how quickly they came together, but I was not entirely happy with the texture. They had a nice buttery orange flavor, but were a little dry and not as delicate as I would prefer. So when I woke up this morning and I knew I had an extra hour today because of setting the clocks back, I thought...it is time to try again. I also promised some of my students who read some Julia Child books for my summer reading project last summer that I would bake them some madeleines, so I had added incentive!
    I  did some online research and found a different madeleine recipe that uses fewer eggs(which although they do hold together the little cakes, can have a tendency to dry them out). They were in the oven ten minutes later and I must say, were much better this time. What I am really waiting for is to get my friend, Eric's recipe. He grew up in France and his madeleines are superb. But until then, these will do. Maybe you want to splurge for a pan and give these a try. You won't be sorry you did.
Madeleines

1 cup sugar
5 eggs
1/2 cup butter( melted)
1 tsp. vanilla
the zest of one ornge( or lemon)
1 1/2 cups cake flour
2 tsp. baking powder

confectioner's sugar (for dusting)


Preheat oven to 400 degrees.

In a medium bowl mix together your sifted flour and the baking powder and set aside.

Beat eggs in a large bowl until pale yellow in color. Mix in sugar, butter, vanilla and zest until well blended.

Fold the dry ingredients into your egg mixture with a wooden spoon or rubber spatula. Be sure to mix evenly but do not overmix or your cakes will be too chewy.

Drop by tablespoon into each greased madeline mold. There are 12 in a pan. 

Bake for 8-9 minutes or until the top of each puffy little cake springs backwhen you touch it and the edges look G, B and D. (Golden, brown and delicious.)

Turn your cakes out onto a wire rack to cool and bake the next batch of 12. 

Sprinkle your cakes with a little powdered sugar and enjoy with a nice cup of tea.

yours in baking-
p


Sunday, October 16, 2011

Almond Biscotti

   It has been some time since my last  post and I have been baking quite a bit during that time, but just couldn't seem to find the time to take photos and write a post. I have a number of new recipes to add so I may make up for lost time in short order!
    With school back in session...so comes Java Hut and our Thursday morning gathering presents regular opportunities for me to try out new recipes or whip up a past favorite.
    Seeing that it is a coffee gathering, biscotti is always a popular option and these almond biscotti have made a regular appearance although I do like to "mix it up" with different add-ins or chocolate drizzled on top.
    I found this recipe online at "Joy of Baking" and I have made subtle changes to it over the past few years that I have been baking them. As I have said before, many people find bisoctti intimidating for some reason. Remember they are simply a twice-baked cookie and I have to say are even easier than making traditional cookies because you bake an entire "batch" in one loaf for the first baking!

Almond Biscotti
~1 cup sliced almonds
1 tsp. baking powder
1/8 tsp. salt
2 cups all purpose flour
3/4 cup sugar
3 eggs
1/2 tsp vanilla extract
1 1/2 tsp. almond extract

2-3 squares Melting chocolate for the drizzle on top
(I used white chocolate for these, but I used semi-sweet chocolate which makes for a nice contrast on the biscotti)

Optional add-ins; chocolate chips, dried cherries, 1/2 tsp. cinnamon

(If you want to toast your almonds, places them on a cookie sheet in a 350 degree oven for about 6 mintues. Watch them carefulyl as one they start to brown, it seems to take no time at all for them to burn.)

In a small bowl, beat eggs together with your extracts.

In large bowl, mix together flour, sugar, baking powder and salt . With either a hand mixer or just a spoon, stir in the egg mixture until well-mixed. Then stir in your almonds and any other add-ins you choose. I have a biscotti pan, so I place the dough in the greased pan and pat it down with slightly wet fingers(so that the dough doesn't stick to them).

If you do not have a biscotti pan, no worries. Simply form a long flat loaf on a greased cookie sheet.  The loaf should be about twelve inches long and 3-4 inches wide.

Bake in a 350 degree oven 25-30 minutes or until the loaf feels firm to the touch. Take out the loaf and let cool slightly. (You can keep the oven on but turn it down to 325 degrees)

Using a sharp knife, cut the loaf into 1/2 inch slices. (If you want to have some really long biscotti, cut your loaf on the diagonal.)

Place the biscotti on a clean cookie sheet and put back in the oven for 8 minutes. Turn over the biscotti and bake another 8 minutes or until they look slightly G, B and D on the edges...golden, brown and delicious.

Place biscotti on a wire rack to cool.

Melt 2-3 squares of melting chocolate and then drizzle over the tops of the biscotti with either a fork or a small spoon. Let stand until chocolate has set.

Sit down with a nice cup or coffee and enjoy.


Biscotti make great gifts. Simply put 8-10 in a nice bag and tie it with a decorative ribbon.

yours in baking-
p


Monday, August 15, 2011

Oatmeal Bread


     This is the oatmeal bread that my mom used to bake for us when I was young. I remember having it with warm freshly made applesauce on top. Yum. The bread is a nice moist loaf, perfect for sandwiches and toast and has just a hint of sweetness from the molasses. This is another recipe from the "Woman's Home Companion" Cookbook.


"A Woman's Home Companion" Oatmeal Bread
(makes 2 one pound loaves)

1 1/2 cups boiling water
2 tsp. salt
1 TBS. butter
1 cup old fashioned oats
3/4 cup lukewarm water
2 1/4 tsp. yeast
1/4 cup molasses
1/4 cup brown sugar
~ 5 cups flour

     In a large bowl mix together boiling water, salt and butter. Then stir in oats and let sit until lukewarm. Meanwhile dissolve the yeast in the lukewarm water and then stir in the brown sugar, molasses and 1 cup of the flour. Stir this mixture into the oats and then stir in the rest of the flour until it makes a stiff dough. Turn out onto a floured board and knead for ~10 minutes, adding a little more flour if necessary. The dough should now be soft and elastic. 
     Place in a greased warm bowl and cover with plastic wrap. Place the bowl in a warm place and let rise until doubled in bulk (about 2 hours). Then turn the dough out onto the board and divide into two equal parts; form into balls, cover closely with plastic wrap and let sit for 10 minutes. Then form into loaves and place in greased loaf pans. Cover and let rise for about 1 hour or until doubled in size.
    
     Bake in a 400 degree oven for 35 to 40 minutes until golden brown and the loaves sound hollow when tapped on the bottom. Gently lift the loaf out of the pan to test this. Remover bread from oven and rub the top of the loaves with the end of a stick of butter. This adds a nice little salty flavor to the bread and keeps the top crust soft.

Enjoy-
yours in baking-
p

Wednesday, August 10, 2011

Zucchini Brownies

    I promised a recipe for zucchini brownies about ten days ago and here it is! Believe it or not, after all of my concerns about zucchini taking over my backyard, I have had a rather poor crop this summer. I even had to purchase! zucchini to make this recipe. (At least it was locally grown.) This recipe makes an entire sheet pan so plan on sharing! This is an especially good recipe to bring to a potluck both because it makes a large batch and because it is fun to show your friends another way to bake with zucchini that is not just zucchini bread!

   This recipe was adapted from the cookbook " Creme de Colorado" and was referred to as "Chocolate Zucchini Sheetcake" in that cookbook. However, I consider them a moist brownie.

Zucchini Brownies

1 1/2 cups light brown sugar
1/2 cup sugar
1/2 cup butter, softened
1/2 cup oil
3 eggs
2 tsp. vanilla
1/2 cup milk with 1/2 tsp. vinegar added
2 1/2 cups flour
3/4 tsp. allspice
1 tsp. cinnamon
1/2 tsp. salt
2 tsp. baking soda
5 TBS. unsweetened cocoa powder
4 cups firmly packed grated zucchini(You may be tempted to use more but please don't! The brownies are already very moist.)
1 cup chocolate chips(I prefer to use mini chips if I have them, but regular chocolate chips are also fine.)

Preheat oven to 325 degrees. Spray a sheet pan with cooking spray and then dust generously with either flour or unsweetened cocoa powder.

In a large bowl, mix together the sugars, butter, oil, eggs, vanilla and milk. In a separate bowl mix together all dry ingredients and then stir into the creamed mixture. Stir in the zucchini and then spread in your prepared pan. Sprinkle evenly with the chocolate chips and bake about 40 minutes or until the top springs bake when you touch it.

You can dress up these brownies with a dusting of powdered sugar and a dollop of sweetened whipped cream and this becomes a dessert for a nice dinner.

Because these brownies are so moist, they easily keep for a few days if you cover them with plastic wrap.

Enjoy!
yours in baking-
p


Tuesday, August 2, 2011

Choco-chip Banana Muffins


       In the summer it seems that it is always difficult to "keep up" with bananas. I like them when they are just ripe, with only a few brown spots. For some reason, I just don't care for them as much when they get softer and are really super sweet. So during the summer, it seems I usually have a couple of bananas on hand that need to be "re-purposed". Fruit smoothies are always an excellent choice, but I also love these muffins. They are moist and will keep for a few days (if they aren't eaten first)!

 Choco-Chip Banana Muffins

* 1/2 cup butter, softened
* 1 cup light brown sugar
* 2 eggs, lightly beaten
* 2 cups flour
* 1/2 tsp. salt
* 1/2 tsp. baking powder
* 1/2 tsp. cinnamon
* 2 cups mashed bananas(about 2 large or 3 medium bananas)
* 1/2 cups chopped nuts (optional)
* 2/3 cups chocolate chips

In a medium bowl, cream the butter and sugar together until well blended. Mix in the beaten eggs. Mix all dry ingredients together and then stir into the butter and egg mixture. Then stir in the mashed bananas until thoroughly incorporated and add chocolate chips and the nuts if you decide to include them.
        Divide the batter evenly in a 12 cup greased muffin tin. I like to use fun papers to line the muffin cups. I always like to find a way to use colorful things and it makes the clean-up even easier! The muffin cups will be quite full, but don't worry. These muffins do not rise as high as some muffins and cupcakes so they will not overflow! 
       I then mix one tablespoon of sugar with 1/2 tsp. of cinnamon in a small dish and then sprinkle generously over the tops of the muffin batter. It makes them smell divine while they are cooking and it makes a nice little flavor boost when you bite into the muffin.

       Bake in a 350 degree oven for 28-35 minutes. I used only 2 large bananas today and they did not seem as banana-y(nice word!) so I only baked them 28 minutes. You can tell they are done if you touch the top of one of the muffins and it springs back.


Cool on a wire rack for 5-10 minutes. Sit down with a cup of coffee or juice and enjoy.

yours in baking-
p


Monday, July 25, 2011

Lock Your Car Doors! It's Zucchini (bread) Time!

    Well, it is late July in New Hampshire and that can mean only one thing...zucchini season. In May and early June, my garden seems to grow so slowly that it is is difficult to imagine having fresh garden vegetables and then July and August come and it seems like they will never stop growing! The joke here goes that you have to be sure to lock your car doors when you go to a friend's house... otherwise when you get home you realize you have a back seat full of zucchini, some frighteningly large!
    While this grand proliferation often happens with lots of veggies, it is the zucchini that always gets a bad rap..the first one of the summer is delicious,,, then as the week progresses: after zucchini on the grill, grated zucchini into the freezer, zucchini casserole, steamed zucchini, zucchini quiche, you start to ask yourself,"What else can I make?!" Well, I love zucchini bread and I often make this recipe which I got from my mom many years ago. It is a tad sweeter than some zucchini bread recipes and is especially tasty toasted!

  Mom's Zucchini Bread 
for one loaf (EASILY doubled)
2 eggs
1/2 cup oil
1 cup sugar
1 3/4 cup flour
3/4 tsp. salt
1/2 tsp. cinnamon
scant 1/2 tsp. baking powder
1/2 tsp. vanilla
1 cup grated zucchini
 1/2 cup raisins
1/2 cup rough chopped pecans or walnuts

   Beat eggs and sugar together, then gradually add oil, mixing carefully to make sure it fully blends in with the egg mixture. Mix together all of the dry ingredients and then stir into egg/oil mixture until well blended. Stir in zucchini; then add raisins, nuts and vanilla and stir just until everything is incorporated. 
   Spread batter in a greased standard loaf pan and bake in 350 degree oven ~50 minutes or until a wooden toothpick inserted in the center comes out clean. Cool on a wire rack. This bread freezes really well. I simply defrost it overnight, wrap it in foil and put it in a 225 degree oven for about 40 minutes and it is difficult to tell that it was previously baked and frozen. 
    So here is one way to bake with zucchini. Up next are my chocolate zucchini brownies, yum!

enjoy-
yours in baking-
p

Tuesday, July 19, 2011

"But it's fruit! #2" aka Rustic Red Raspberry Turnovers


I am always tempted by the cooking magazines at the checkout in the supermarket and I gave in last week when I saw Fine Cooking "Picnics and Cookouts". There are alot of intriguing recipes in the magazine but I was drawn to the "Rustic Red Raspberry Turnovers". Raspberries are in season right now and I love them, so I thought I would give these a try. I made these while my mom was visiting and she gave me a thumbs up for the recipe. I was surprised, frankly, at how easy the pastry dough was to make AND it is really delicious. It tastes a little like a sugar cookie, but not nearly as sweet. I definitely recommend making these for your family or even for company!

Rustic Red Raspberry Turnovers 

Buttery Shortbread Pastry Dough

2 cups flour
14 TBS. butter
1 large egg, lightly beaten
2 TBS. sugar
1 TBS. whole milk or heavy cream
2 tsp. fresh lemon juice
1 tsp. salt
In a food processor, combine the flour, butter, egg, sugar, cream, lemon juice and salt and pulse until the dough starts to come together in big clumps.

Turn the dough out onto a counter and divide in half. Pat each half roughly into a square, about 1 inch thick, wrap in plastic wrap and chill for 20-30 minutes.


The Filling
5 tsp. granulated sugar, more as needed
1 1/2 TBS. flour
1/2 tsp. cinnamon
1/2 tsp. nutmeg
2 1/2 cups fresh raspberries
1 to 2 TBS. milk


   Line a baking sheet with parchment paper. On a lightly floured surface using a floured rolling pin, roll out one square of the dough into a 9 by 14 inch rectangle. If the dough seems too sticky, dust it with a little flour. Cut the dough into 6 rounds, each about 4 inches in diameter. Do not worry if they are not perfect, remember they are RUSTIC turnovers. Repeat this process with the other square of dough and you will have 12 rounds total.
   In a large bowl stir 5 tsp. of sugar, 1 heaping TBS flour, 1/2 tsp. cinnamon and 1/2 tsp. nutmeg.Add 2 /12 cups fresh raspberries and toss to coat the berries. Preheat oven to 400 degrees.
   Place a heaping TBS of filling on one half of each round. (4-5 raspberries or so). Gently press the raspberries down. Wet the edge of the round with water and carefully fold over the other side and press the edges of the dough together with either your fingers or the tines of a fork. If any small cracks form in the turnovers, try to gently close them with your fingers. Transfer the turnovers to the baking sheet with a metal spatula and chill in the fridge for 30 minutes.
   Brush the tops(not the edges) of the turnovers with milk and sprinkle with sugar. Bake for 20-25 minutes until G, B and D. Golden, Brown and Delicious! Transfer to a wire rack to cool.
     Now pour yourself a nice tall class of lemonade, (mine here is mixed with some mango juice). Sit down and enjoy a turnover, or two! Remember it's fruit!

yours in baking-
p